Premiere Pro Video Editing Course For Free
Premiere Pro video editing course for free
in this Adobe Premiere Pro free training course for beginners we will learn the basics of video editing , starting from creating your first project in premiere until rendering out your final video file.
throughout this easy to follow and fully detailed Premiere Pro video editing course , we will learn video editing basics by explaining the most important fundamentals that anyone needs to easily start using Adobe Premiere Pro to Edit , Trim , and Cut video clips like a pro.
A – we will start our training course by knowing how to create a new project in premiere then how to import footage clips inside the project panel and how to create a sequence based on the imported video source then we will learn how to navigate and how to use the tools in the timeline to start cutting and triming the video footage.
B – in the second tutorial in this training course will describe how to adapt multiple video resolutions in Adobe Premiere Pro as it’s a very needed & important task for anyone who wants to learn video editing , also it can be confusing for beginners if he/she don’t know the correct method or technique to adjust and adapt several video clips with different video resolutions in the same sequence.
C – after the second tutorial the third tutorial in this training course comes as a completion for what we’ve explained in the second tutorial about how to adapt multiple video resolutions in Premiere Pro. the third tutorial talks about the same topic but focusing more on upscaling DV video resolution or SD videos into Full HD in Premiere Pro.
D – the 4th tutorial is about audio treatment and EQ , this tutorial explains how to enhance the audio captured during filming using a built in camera microphone and how to Equalize bad vocals or voiceover inside Adobe Premiere Pro using addons.
in this tutorial we will use iZotope Ozone plugin to do the full audio treatment and Equalization like ( removing bad frequencies , adding audio compressor , adding DeEsser , etc… ) it’s not just an Equalization tutorial but also describes how audio Mastering can be done using a plugin like iZotope Ozone inside Premiere Pro.
E – the 5th last tutorial in this course is very important , its about video and music synchronization and how to synchronize the audio effect with the visual events and motions that are happening in the video and vice versa and how to align video cuts on the beat of music.
1 - Learn basic video editing in premiere pro from A to Z
Overview :
- creating a new project in premiere pro
- importing videos inside the project panel
- creating a new sequence from clip
- dragging the video clips inside the timeline
- how to remove the video audio track if needed
- an overview about timeline navigation
- cutting and trimming the video footage
2 - adapting multiple video resolutions in premiere pro
Overview :
- creating a custom basic sequence preset in Premiere Pro
- importing the videos
- manually stretching and upscaling the video clips
3 - Upscale DV or SD videos to Full HD in Premiere Pro CC
Overview :
- creating a new project
- creating a new sequence
- using the automatic scale to frame size options
- manually edit the scale of the video
- using Red Giant instant HD for up scaling
4 - Enhancing voice using izotope Ozone in Premiere Pro
Overview :
- limiting audio from clipping
- using audio keyframes to clean & remove noise , clicking and scratches
- using iZotope Ozone EQ to remove bad frequencies from audio
- adding dynamic EQ to enhance frequencies
- adding stereo imager to add more width to the audio track
- adding a maximizer to limit enhance and compress the audio signal
- adding a DeEsser to reduce the sharpness of the S character
- adding iZotope Ozone dynamic compressor to compress the entire audio track
5- Video editing and cutting to the beat of music in Premiere Pro
Overview :
- using the spacebar to create synchronized video cuts to the beat of music
- creating synchronized cuts using markers
- creating musically synchronized cuts using Markers
- correcting the markers position by looking to the audio waveform
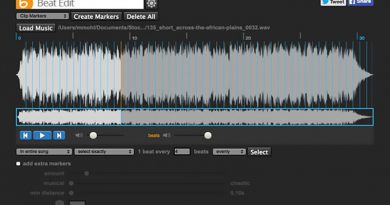
- using an automatic beat detection script like “Beat Edit” to synchronize
Finally it’s time to know how to export and render out your video editing final project from Premiere Pro, so here is a Complete guide on how to rendering your video montage and what are the best adapted parameters to set during the export media proccess.
After all i hope you have been enjoyed while reading and watching the tutorials in this training course and thank you for the time you have spent in reading this article.
Please feel free to Contact us at anytime if you have any questions regarding the tutorials we will be glad answering and assisting you it’s our duty.
please make sure you follow our page on facebook and subscribe to our youtube channel to get informed each time we post new articles and tutorials.
