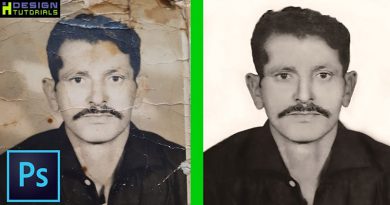
Photoshop face manipulation techniques and FX
Photoshop face manipulation techniques and FX
in this Adobe Photoshop full training course we will learn together the basic fundamentals of facial photo manipulation techniques and effects.
in this step by step fully detailed photoshop course we will explain various options in Photoshop and learn the essentials that will allow you to understand how to use photoshop abilities to create creative photo manipulations and art works and entirely change the appearance of any character into whatever ideas you want to achieve.
through out the steps explained in this adobe photoshop course we will take you from the beginner level to an advanced stage so after completion of this course you will be immediately ready to invest in your own imagination to create amazing art works in Photoshop.
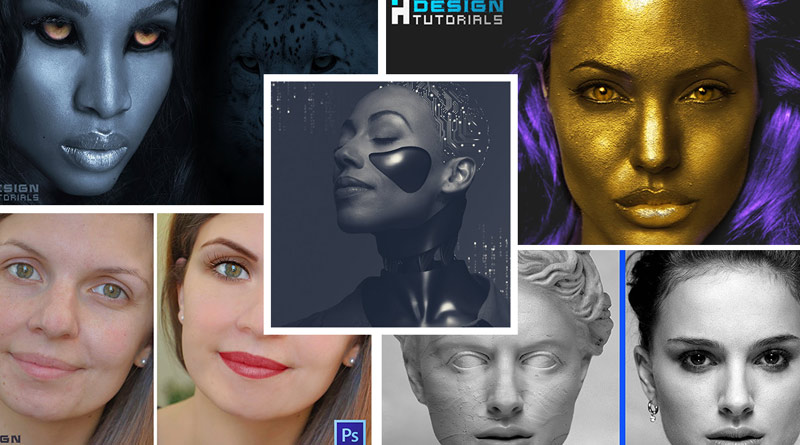
so let’s start our course by an easy eyes replacement and blending tutorial , in this first tutorial we will put the eyes of a tiger in a female human face.
1- blending eyes of tiger on female face in photoshop
Overview :
- using the selection tool to cut out the eyes of the tiger
- using the eraser tool to mix and blend the eyes of the tiger with the female face
- using the burn tool to darken and tweak the eyes of the tiger
- using the Dodge tool to whiten and tweak the eyes of the tiger
- applying a color grade adjustment layer
- using the pen tool to select and cut
- applying color adjustments to enhance the final look
this tutorial is just an intro to motivate you so let’s move on to the next tutorial.
2- Easy Digital Make Up Tutorial in Photoshop
in this second tutorial separated into 5 steps we will dive in more in photoshop functionalities and discover how to apply an easy digital make-up in photoshop.
Overview :
Step 1 Eyebrows
- using the pen tool to select and copy the eyebrows in a new layer
- using the eyedropper tool to copy the eyebrows color then fill the eyebrows with that color to enhance the color
- changing the blending mode and decreasing the opacity to create transparency
- applying gaussian blur filter to mix the appearance of the copied eyebrow
- using the hue and saturation parameter to correct the color of the eyebrows
Step 2 lashes
- importing new lashes for the subject in photoshop
- changing the blending mode of the imported lashes to make it transparent
- using the brush tool to add more filaments to the lashes
- transforming the selection and using warp mode to bend the lashes
Step 3 eyes make up
- using the brush tool to colorize the eyelids
- using the hue and saturation parameters to enhance the added eyelids color
Step 4 face tint
- using the brush tool to add a face powder tint and clean up the face
- using the dodge tool to apply extra enhancements
Step 5 lipstick
- using the pen tool to copy the lips
- using the hue and saturation parameters to add lipstick color
- using blending options to apply a fade to the lipstick
- using the shadow and highlight parameters to enhance the color of the lipstick
please watch this tutorial in full screen mode and follow the steps then try to practice this tutorial on other pictures.
the next tutorial is a metallic material simulation , the full tutorial is about color manipulation and light reflectivity.
its a skin retouching tutorial so we will Learn how to turn skin into gold in Adobe photoshop.
3- Turn skin into gold in Photoshop
Overview :
- using shadows and highlights parameters to prepare the metallic glow effect
- applying a photo filter to simulate the golden color
- using color balance to correct more the color
- applying a texture on the subject from filter gallery
- using the dodge tool to add more glow on the face
- finally separating the hair and the eyes to change their color
after completion of the previous tutorial now you know a variety of tools inside Photoshop , before we go ahead to the next tutorial you should at least practice on one of the previous tutorials and traine your self a little bit before we go to the next level.
so grab a photo from the internet and try to apply the previous techniques described in tutorials 1 to 3.
4- transform a person into a stone statue in Photoshop
in this tutorial we will learn how to transform a person into a stone statue or marble sculpture bust in adobe photoshop.
in this detailed guide we will discover another variety of photo manipulation techniques to convert people to stone statues in photoshop.
this tutorial is a mixing and blending lesson in where we will discover how to replace hair and eyes from a character to one another and how to perfectly simulating the stone material on human skin.
Overview :
- using the quick selection tool to remove the background
- using the eraser tool to remove the hair
- using the clone stamp tool to prepare the subject
- applying camera raw noise reduction filter to remove the skin texture from the face & mimicking a soft stone surface
- using the magic wand tool and select and mask options to soften and refining the edges
- using the smudge tool to hide , blur and soften the natural skin details
- using the pen tool to cut the eyes and the hair from a real stone statue
- using the eraser tool to do the mix
- using the dodge tool and the burn tool to apply more tweaks
- using blending modes to apply a texture on the face
after completion of this previous tutorial surely you got a powerful set of tools in your hand that will allow you to concretize different ideas in photoshop and start inventing and using your own imagination to create and apply great art manipulations by your own , for example you can use the techniques described in the previous tutorials to convert human skin into silver or for Ex.. using a wood texture to convert a face into a carved wood statue , actually there is no limit to what you can achieve through the tools you got in your hands now.
5- Sci-Fi robotic photo manipulation theme in photoshop
it’s time for some Sci-Fi photo manipulations this last tutorial in the course is a complement for the previous lessons so i wont give you an overview on what’s the achievements of this tutorial go ahead and discover it your self enjoy the movie ! 🙂
thank you for giving the time reading and following this adobe photoshop course i hope you enjoyed and learned something new.
if you have any questions regarding the tutorials you can reach to us at any time from the contact page.
please make sure you follow our page on facebook and subscribe to our youtube channel to get informed each time we post new articles and tutorials.